USB Passthrough for HyperV
So how do you use a USB devices on a HyperV virtual machine when there are no physical USB ports on a virtual machine!?
The answer is to use the USB ports on the HyperV Server and then use “USB passthrough” so that the client machine can see it.
The problem…
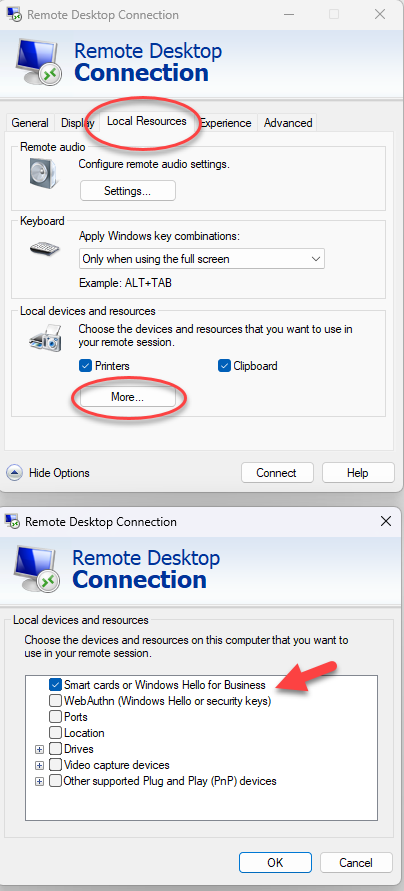
Ordinarily, this is achieved by enabling “Enhanced Session Mode” on both the HyperV server and Vitual Machine, and then configuring your remote desktop connection to share, or “passthrough” drives, USB devices and other connected things.

Then, when connecting to the HyperV client machine via Remove Desktop Connection, you would use the Local Resources tab on the connection dialog, check the relevant devices/ports/drives etc that you want the virtual pc to “see”, and connect.
It seems like this should work…but it doesn’t.
Despite these settings, your virtual pc will still not be able to see the USB dongle.
HyperV seems unable to work with the USB dongle regardless of whatever configuration settings are made.
The solution…
There are 2 parts to the solution:
- The connection method to the virtual PC and
- The USB pass-though process
The connection method – don’t use Microsoft RDP and instead use VNC
Connections to the virtual machine cannot be made using Microsoft Remote Desktop Connection (RDP) sessions. Similarly, you cannot use “vmconnect”, or connect via the HyperV server itself using HyperV. All of these Microsoft-based methods of connection will block access to the USB dongle, despite any configuration settings you may use.
The solution is to use another remote connection method.
TightVNC (https://www.tightvnc.com) can be used to connect to the HyperV client and it will not block access to the USB dongle. Install TightVNC on both the virtual client (in server mode), and use the client mode for client-based remote access.
TightVNC will need to be used whenever any remote access is required where you need to see, use or configure the USB dongle.
Allowing USB-passthrough
USB passthrough can be achieved by using 3rd party software to do what HyperV cannot.
https://www.virtualhere.com is a company that provides a software solution for this at a reasonable price that just works, and there is a trial mode that will allow a proof-of-concept.
Download and install VirtualHere on the HyperV server, as well as the HyperV client.
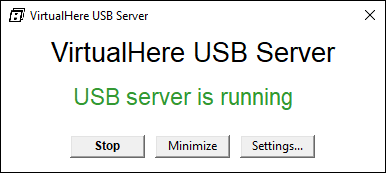
Install VirtualHere Server on the HyperV host machine and run it.
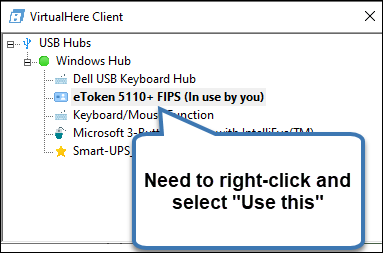
Install VirtualHere Client on the HyperV client machine and run it. It will display a list of all the USB devices that are plugged into the HyperV server machine.
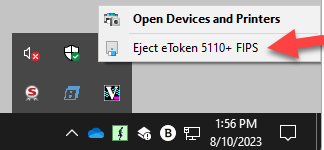
Right-click on the eToken 5510+ FIPS, and select “Use this device”.
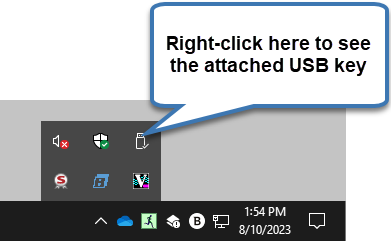
You should now be able to see the USB key from the Windows System Tray
Note: The VirtualHere USB server and client both have to run as a service. How to do this is explained in the manufacturer's instructions.
Installing the USB dongle drivers and software
Once the USB dongle is showing up in the HyperV client, you can now download and install the drivers and software that is used to manage the USB dongle.
Go here to download the SafeNet Drivers
Once you have the Drivers installed, you must install the Windows DigiCert Hardware Certificate Installer.
https://www.digicert.com/StaticFiles/DigiCertHardwareCertificateInstaller.zip
You can follow this guide on how to initialise your token:
How to Setup your USB Token
Notes:
- In Server 2022, after installing the USB token driver, a yellow exclamation mark appears in device manager. You have to replace the driver for this device with the WUDF driver included in Windows. Afterwards the USB symbol appears in system tray.
- The DigiCert Hardware Certificate Installer cannot find the USB token when you are logged in via RDP. It works with the Hyper-V console.
Configure the USB dongle for unattended access
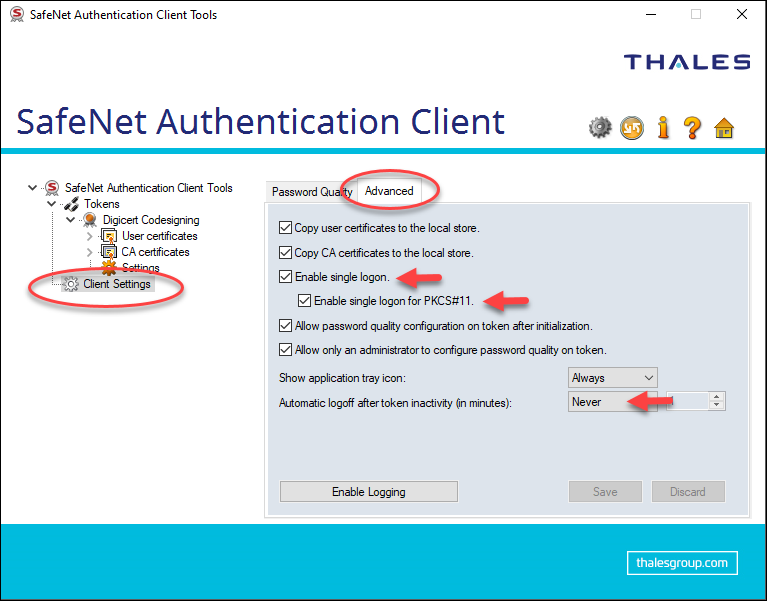
Once the USB dongle has been configured and contains the code-signing certificate, use the SafeNet Authentication client software to configure it so that it doesn’t require password prompting each time you sign a file.
Use the Client Settings > Advanced tab
- Check the “Enabled single logon” checkbox and “Enable single logon for PKCS#11” checkbox.
- Select “Never” in the “Automatic logoff after token inactivity (in minutes)” drop-down box.
Export the Certificate to the local machine
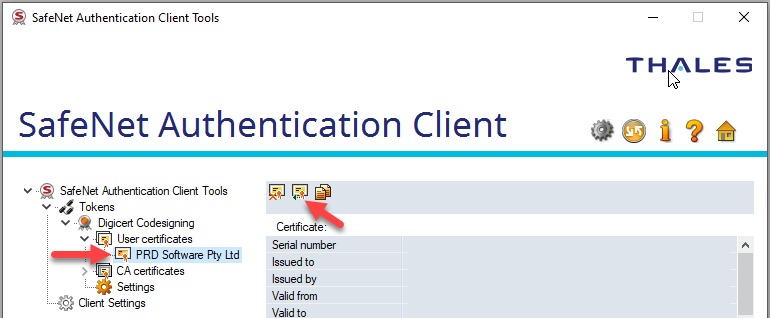
Export the code-signing certificate to the local machine for use.
Open the SafeNet Authentication Client and click on the certificate. Use the “Export” option from the toolbar to export the certificate to a .cer file.
Save it to disk somewhere. This file will be used during the code-signing process.
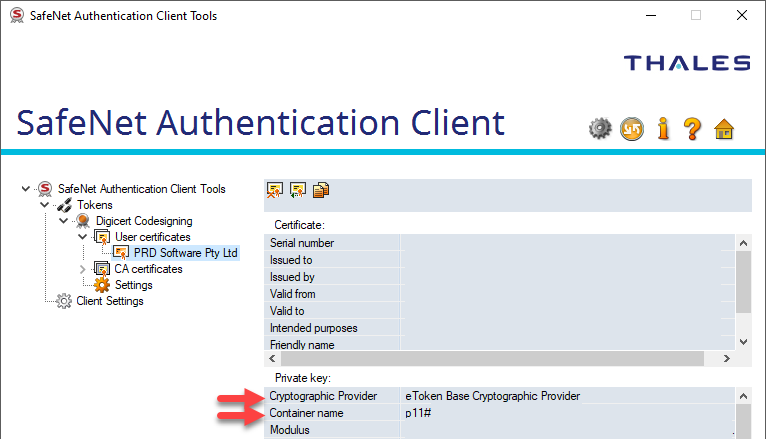
Copy certificate details for use with Microsoft SignTool.exe
In order to sign a file with the code-signing certificate, you will need to extract some information from the certificate. These values will be used as parameters in your signing process.
Copy the name of the Cryptographic Provider. It should be: eToken Base Cryptographic Provider
Copy the Container name. It will in the format p11#xxxxxxxxxxxxxxxxx
Signing a file
Use the Microsoft SignTool to digitally sign a file. Use the parameters from your code-signing certificate to build a command line for the sign tool.
Example command line
shell
signtool.exe sign /v /d ContentDescriptionGoesHere /du DescriptionURLGoesHere /fd sha256 /tr http://timestamp.digicert.com /td sha256 /f "C:\Certificate Location\CodeSigning Cert.cer" /p TopSecretPasswordGoesHere /csp "eToken Base Cryptographic Provider" /kc ContainerNameGoesHere "c:\Files\FileToSign.dll"
Refer to the Microsoft SignTool documentation here:
https://learn.microsoft.com/en-us/windows/win32/seccrypto/signtool
Discussions and Comments
Click here to view and join in on any discussions and comments on this article.