Install an SSL/TLS Certificate in Virtualmin / Webmin Video Guide
Step 1. Generating a CSR and Private Key
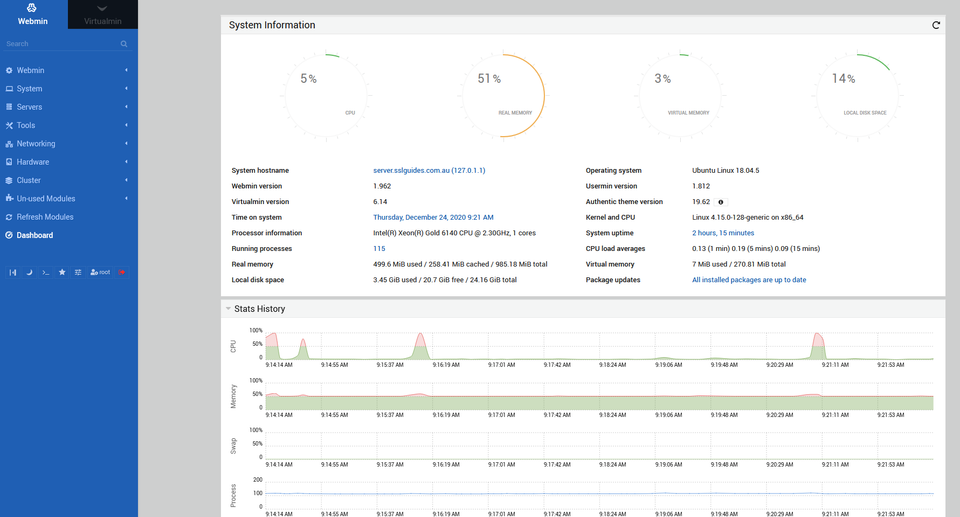
1: Login to your WebMin WHM through your default port. (Generally Port:10000).
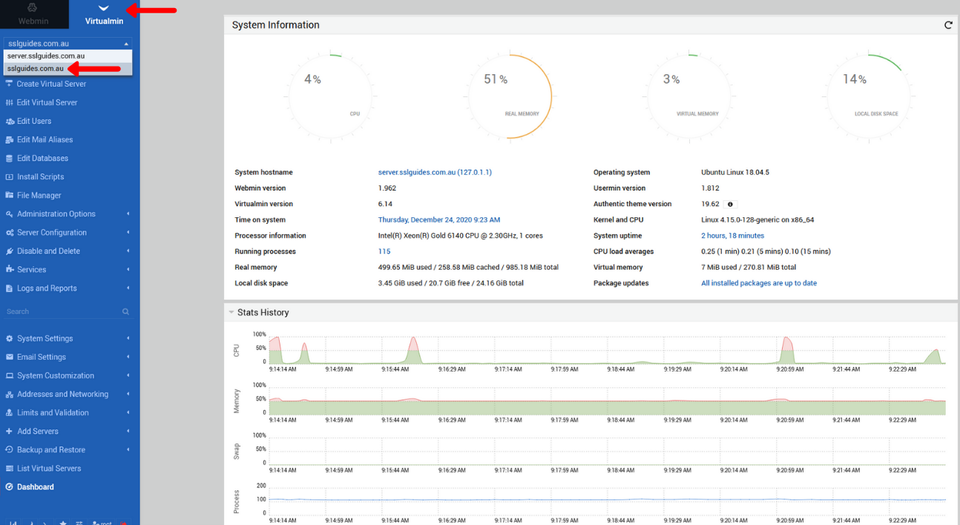
2: Click on the VirtualMin icon on the top left and select your domain name
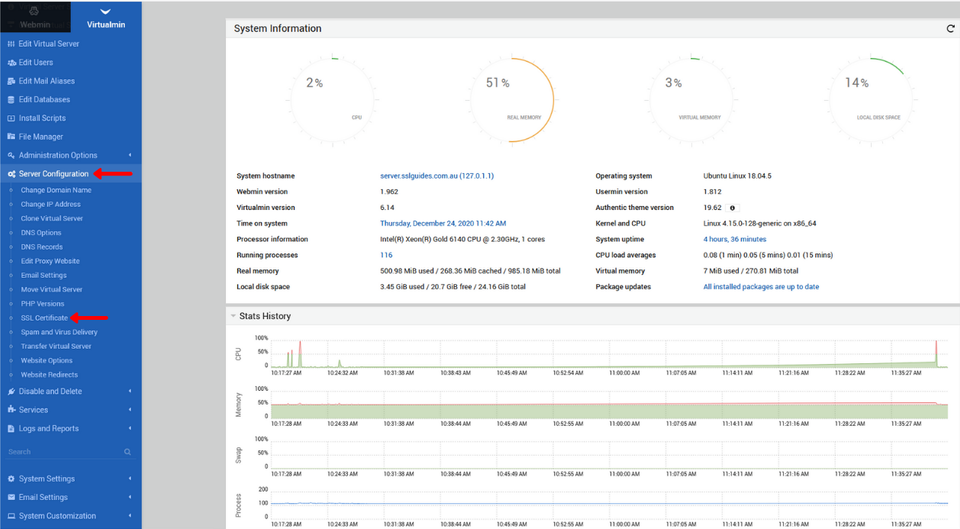
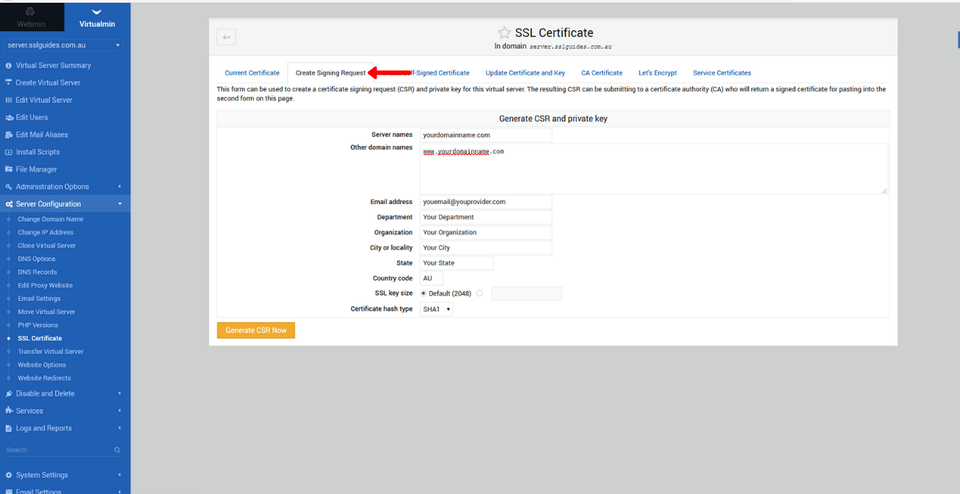
3: Scroll down to Server Configuration and click on SSL Certificate
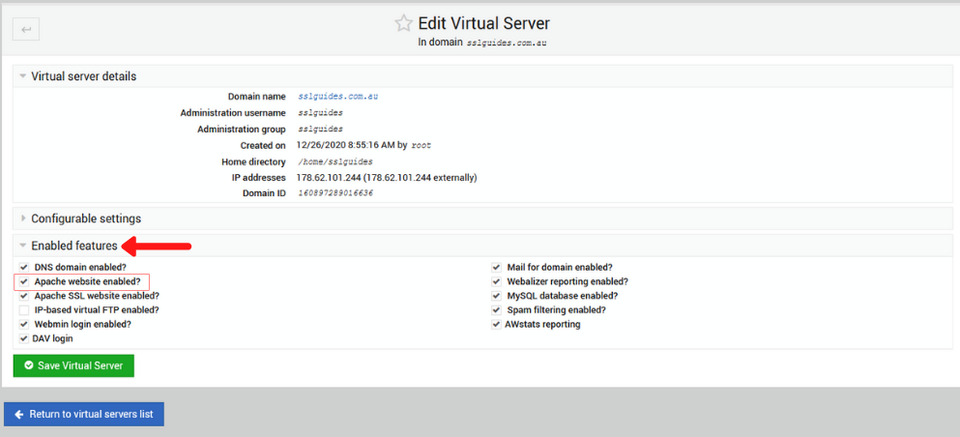
If you do not see the SSL Certificate option, you will need to turn on Apache SSL under Enabled Settings in the VirtualMin Configuration.
To do so, follow the steps below
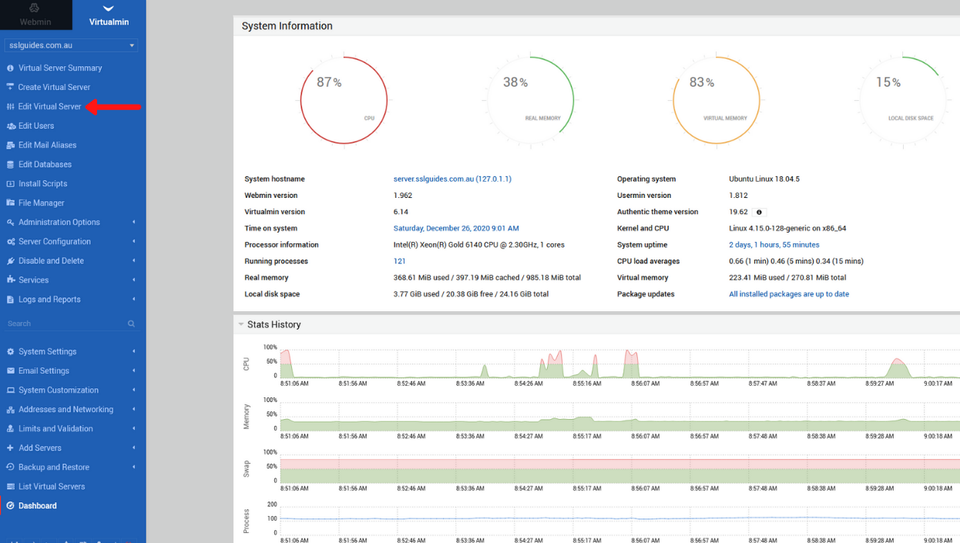
Select your domain name and click on Edit Virtual Server
Click on the Enabled Features Drop-Down and be sure to check the - Apache SSL Enabled Box
Also, make sure to update all packages and install required dependencies.
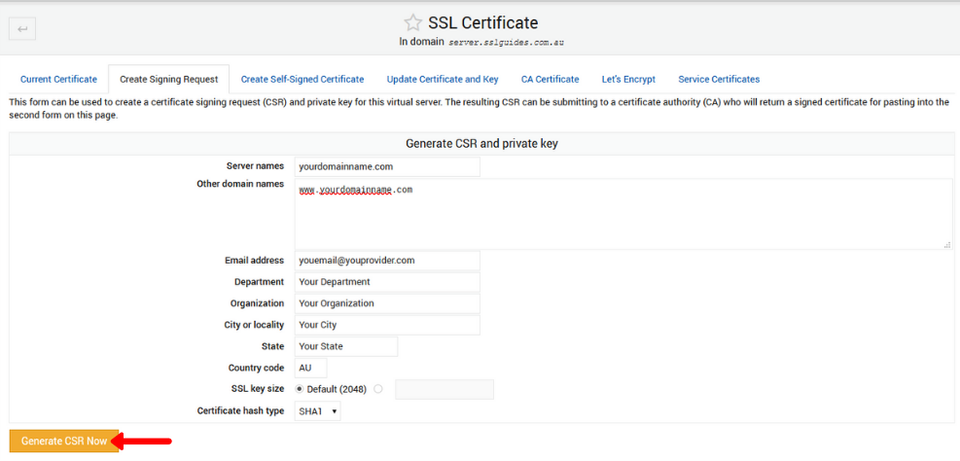
4: Click on the Create Signing Request Box and fill in all your details accordingly.
City: Complete name of the city, no abbreviations.
State: Full name of the state.
Country: Choose your country from the dropdown list.
Organization: If you are a business; Enter your legal entity name. If you're not a business, any value entered will not be used in your certificate.
Department: If you are a business; Write the appropriate division of your company. It is best to use something generic such as "IT".
Email: Enter your email address
5: Click on the Generate CSR button below
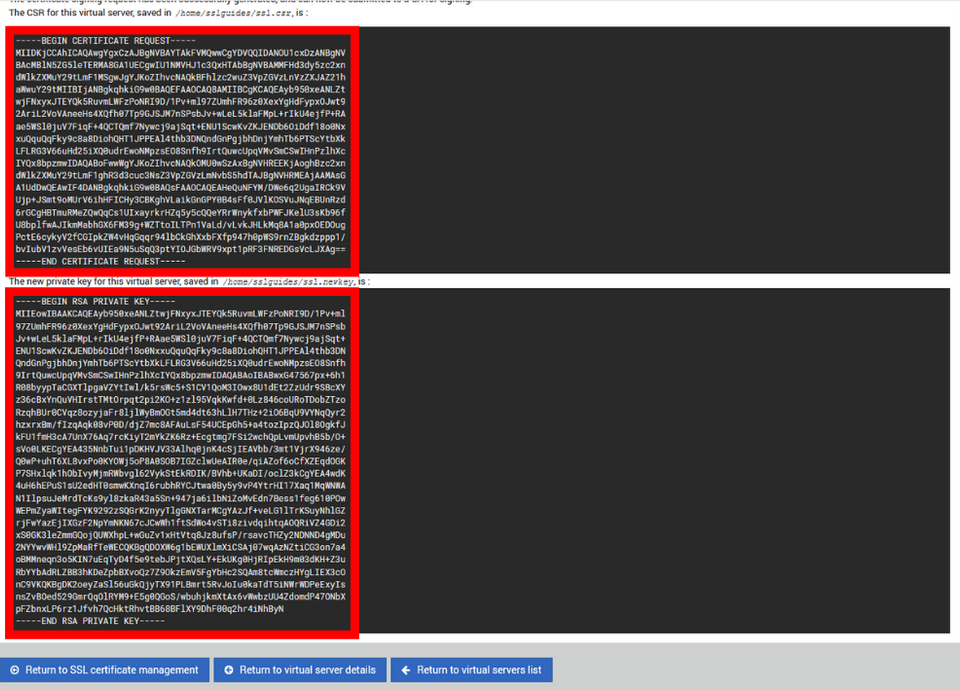
6: You will now see a newly generated CSR (Customer Signing Request) and a Private Key. Make sure you store this securely on your PC as you’re gonna need this later or keep that window open.
Step 2. Order and Configure the SSL Certificate
Now, we need to buy an SSL Certificate. If you visit our SSL Certificates List page, you will see options available, such as a low-cost domain-validated SSL or a wildcard SSL, which also secures the sub-domains.
Cheap SSL Certificates
View our low cost SSL Certificates with domain validation.
Starting at $ per year
If you require any assistance with selecting an SSL Certificate, please feel free to contact our sales team and they will be happy to assist.
1: Order the SSL and complete the checkout.
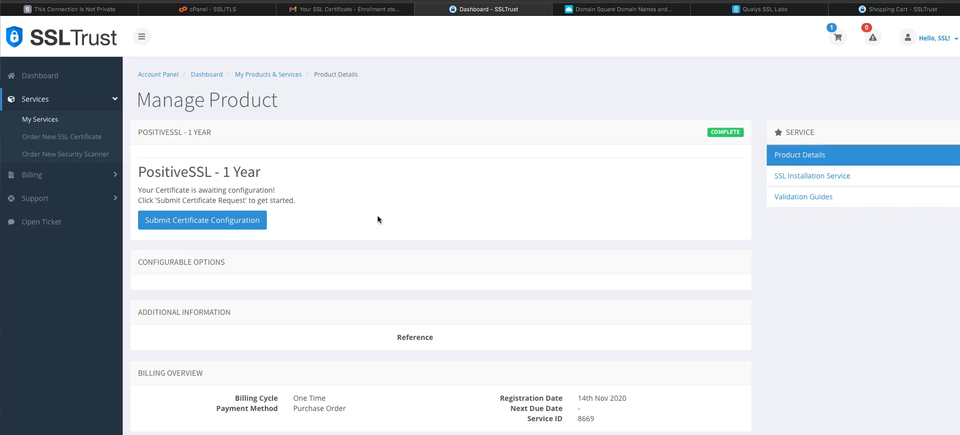
2: Once you have completed the SSL Certificate Purchase you can begin the configuration process. This can be started by going into your SSLTrust account and managing your recent purchase.
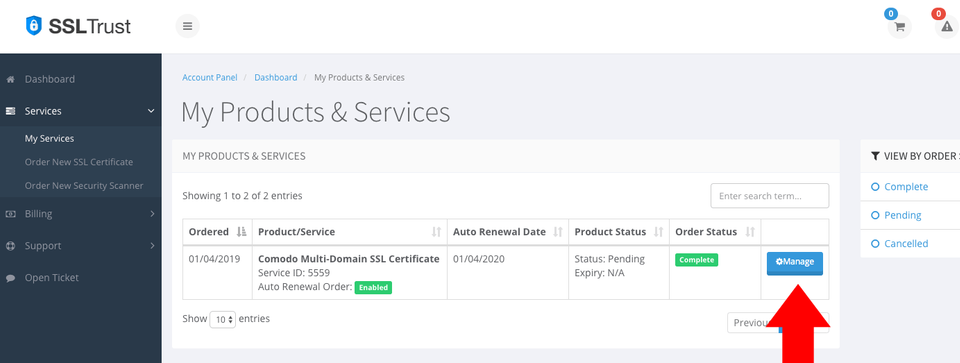
You then will need to click the Submit Configuration button to begin the configuration process.
3: You now need to paste in the CSR you generated in your WebMin Web Hosting Panel. This includes the lines:
text
-----BEGIN CERTIFICATE REQUEST----
  -----END CERTIFICATE REQUEST-----
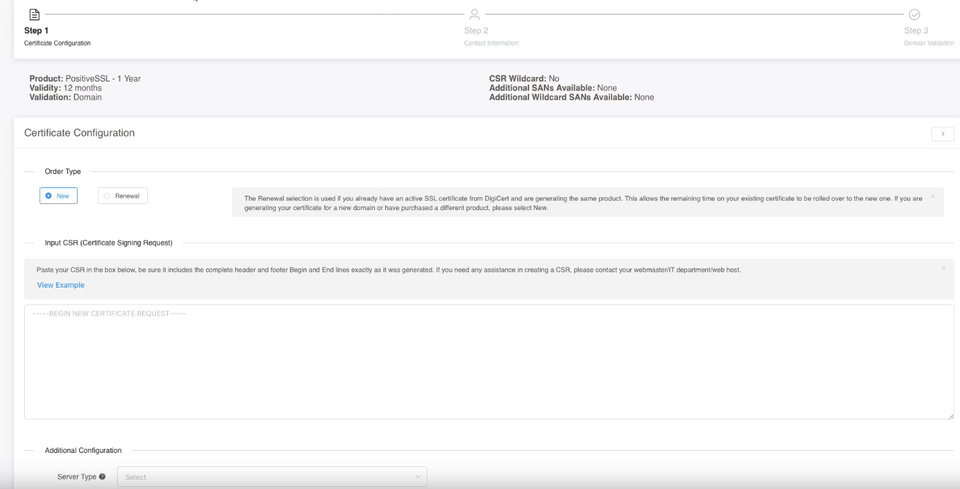
Select OTHER for your Web Server Type as WebMin is not recognized yet. Then continue to the next step.
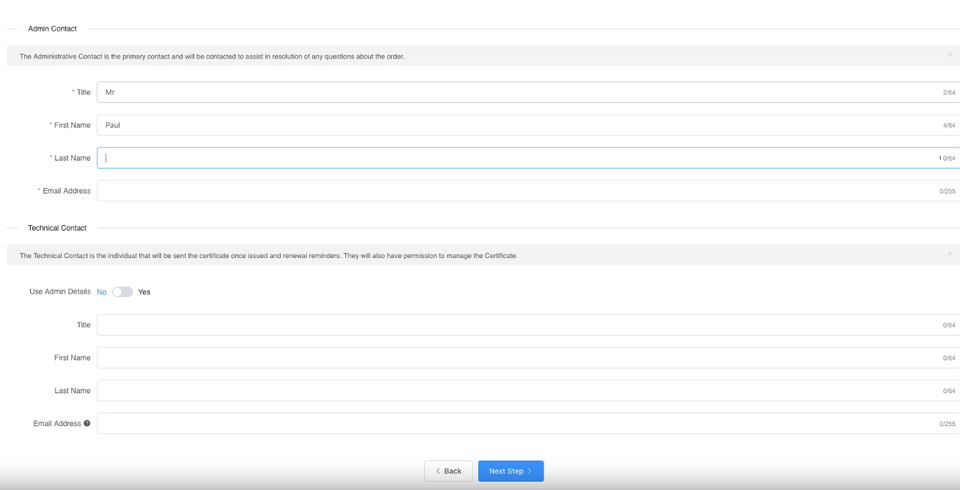
This information is to be of the individual who is responsible to approve and SSL Certificate. If it is a business SSL, it needs to be a contact under the business.
The Technical Contact Information is the details of the individual responsible for the installation and management of the Certificate.
If you have ordered a business SSL, you will also be required to enter your business details. These should be the correct address and phone number and legal entity name. They will be required to be validated by the Certificate Authority, any mistakes will cause delays. More information on Business Validation can be found here.
4: Click Continue to go to the next Step. Here you need to select the Authentication Method to validate your domain name. This is required to prove you own the domain name and have permission to issue an SSL Certificate for the domain.
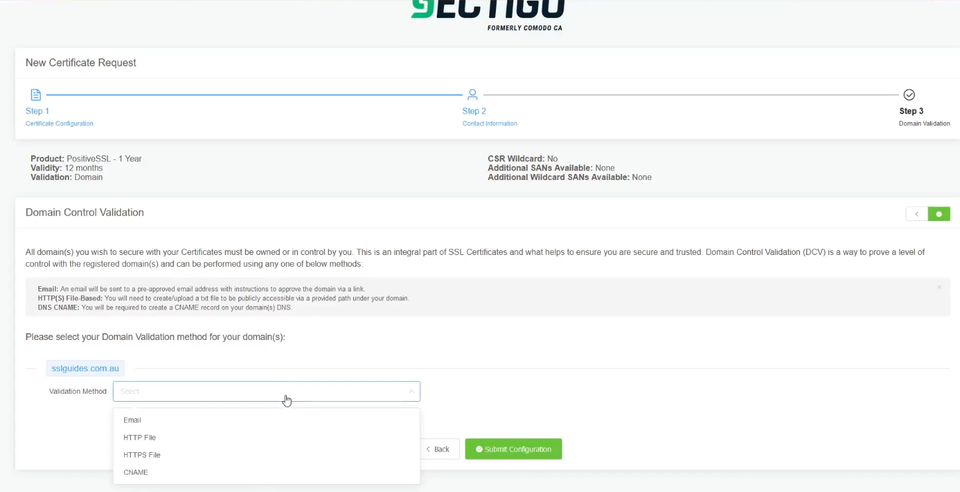
Select the method that will be the easiest for you to use; File-Based Authentication ( HTTP / HTTPS ), CNAME Based Authentication ( DNS ) or Certificate Approver Email.
If you have access to one of the listed emails, this can be the quickest method
Click Continue/Submit to finish the Configuration process.
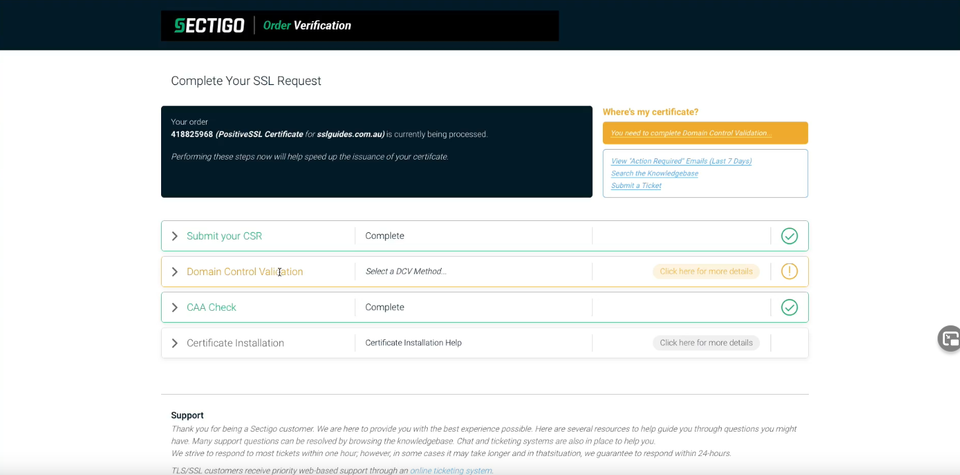
After you complete the domain validation via your selected method, your SSL will be issued. If you ordered a Business SSL, you will need to wait for the Certificate Authority to complete the Business address and phone validation. If the validation has not progressed, or you have not received your Certificate after some time, please contact our support team so we can check on its status.
Step 3. Install the SSL Certificate on Plesk
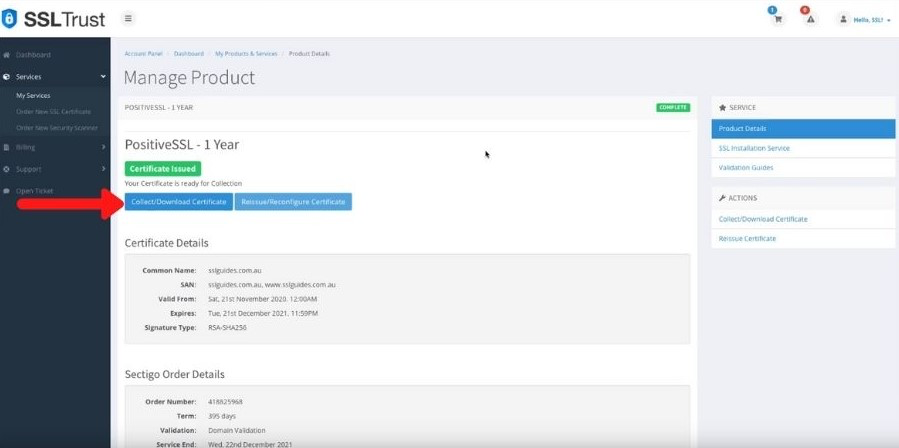
When your SSL Certificate has been issued, you will be emailed the Certificate Directly from the Certificate Authority. You can also download it from your SSLTrust Portal. Downloading it from the SSLTrust Portal is a good option as we format the certificate in an easy to use way.
Again; View your certificate management page within SSLTrust
1: Click on the Manage button and collect/download your certificate
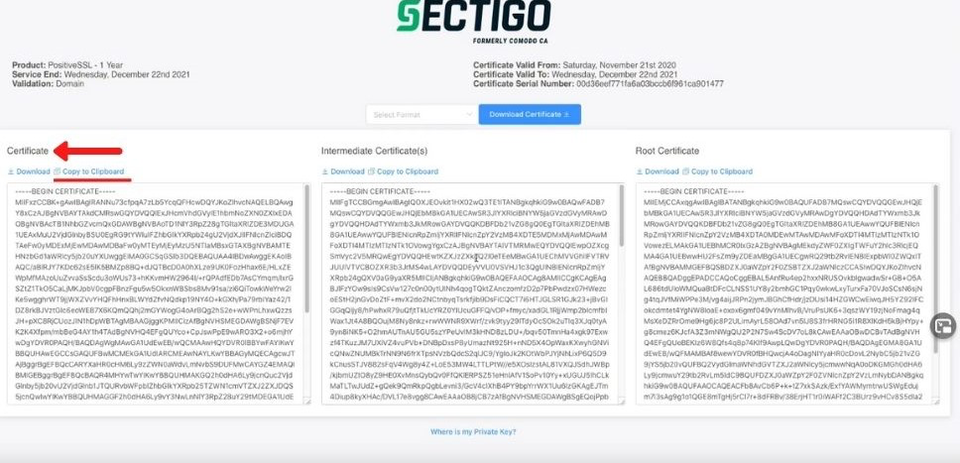
2: Go to the first column and click on copy to clipboard
3: Head back over to your WebMin Dashboard and go to the SSL Certificate setting under Server Configuration again.
4: Click on the Apply Signed Certificate dialog box
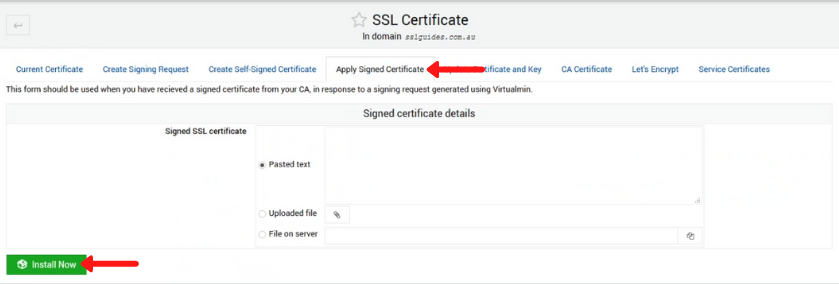
Paste in your copied SSL Certificate. Also, make sure that you check the boxes as Pasted text.
5: Click on the Install Now button.
And we’re done.
In some cases, you will also have to copy and paste you CABUNDLE (Intermediate Certificate) - The chain is required to improve compatibility of the certificates with web browsers and other kind of clients so that browsers recognize your certificate and no security warnings appear.
6: Click on the CA Certificate Dialog Box
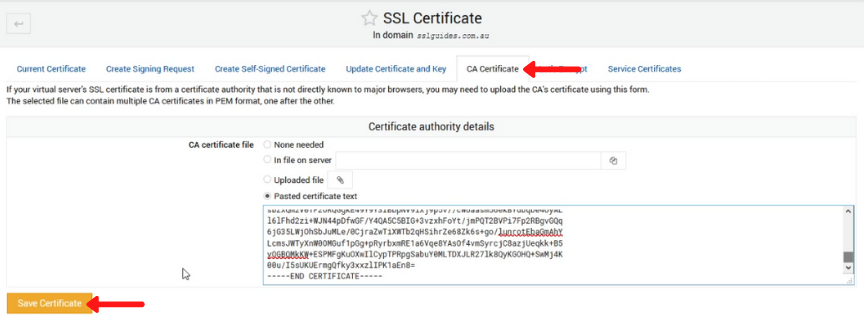
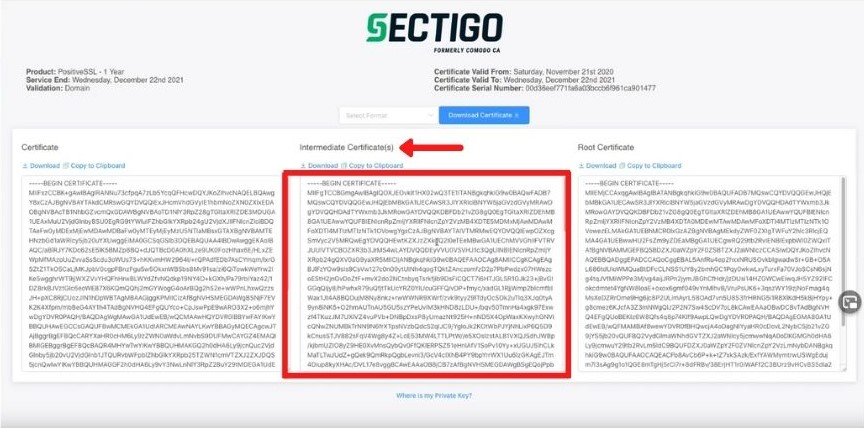
Copy and paste your CABUNDLE (Intermediate Certificate) from the Sectigo Collection page
And click on Save Certificate
Step 4. Check the SSL is working
SSLTrust's Free SSL Checker is a tool that allows you to test and validate the SSL/TLS certificates installed on websites. Simply enter a domain name and it will analyze the certificate, providing details like the issuer, expiration date, encryption strength, and whether the certificate is properly configured and trusted by major browsers and operating systems. In SSL tests, receiving an "A" rating typically signifies that the SSL certificate and its configuration meet high security standards.
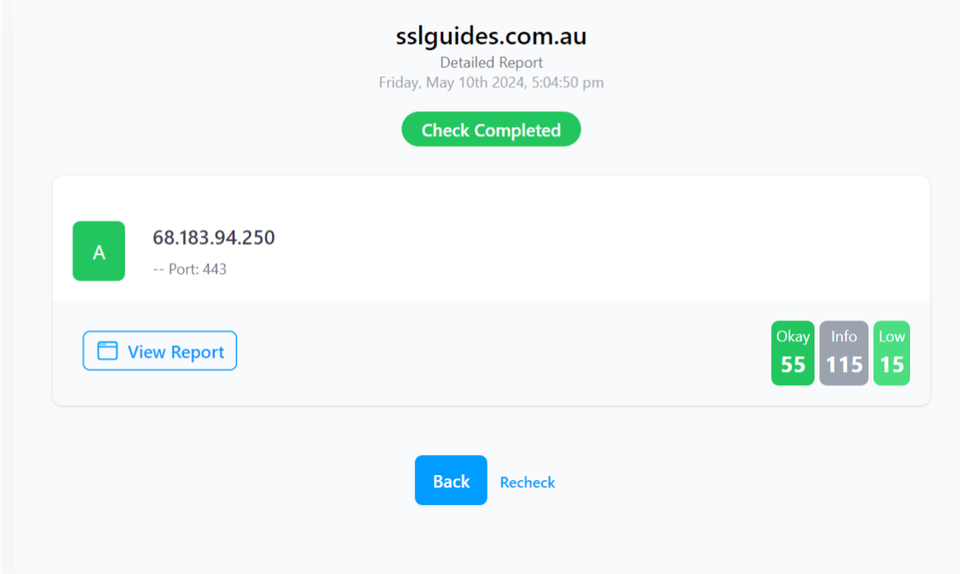
The checker highlights any potential security issues or misconfigurations with the SSL implementation. This free tool makes it easy to verify if a website's SSL certificate is valid and secure, giving visitors confidence their connection is encrypted and their data is protected from eavesdroppers.
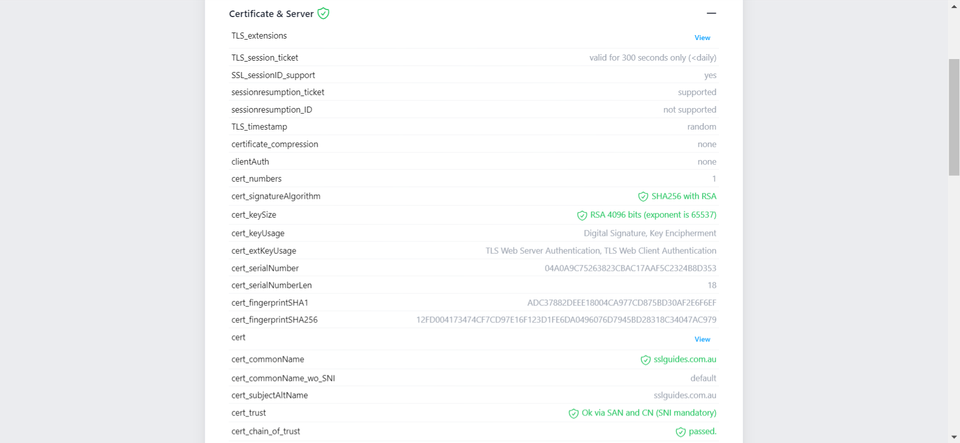
Additionally, you can also performed a detailed check which generates an actionable report with all the ins and out of your SSL Certificate. This includes Protocols, Ciphers, Vulnerabilities and much more.

-
You might require assistance from your web developer or make the necessary updates to your website personally to ensure that all files utilize "https://" and all links leading to and within your website employ "https://".
Optional Troubleshooting and Further Configuration
1: If you do not get an A rating on the SSLLabs test, make sure to have installed the CABUNDLE (Intermediate) Certificate and only allow TLS 1.2 and higher to function
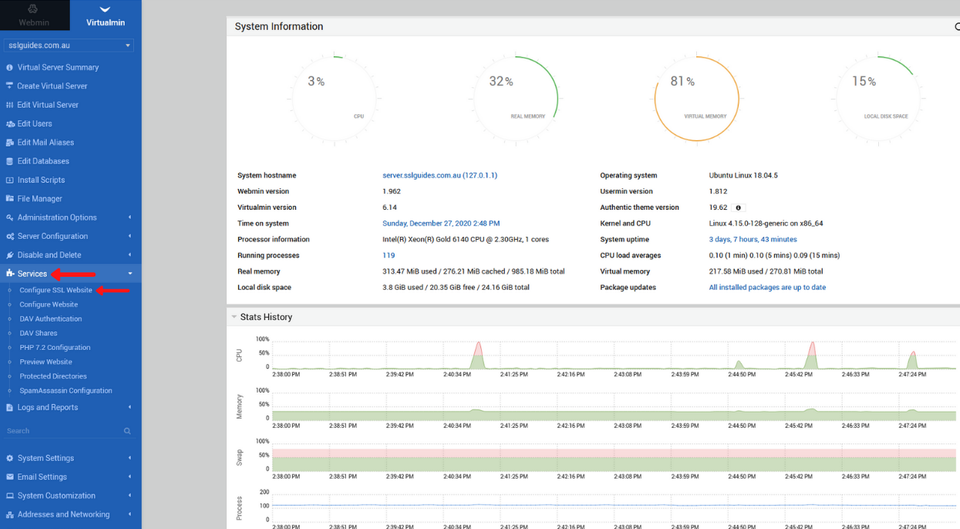
You can check which versions of TLS are enabled by the process below:
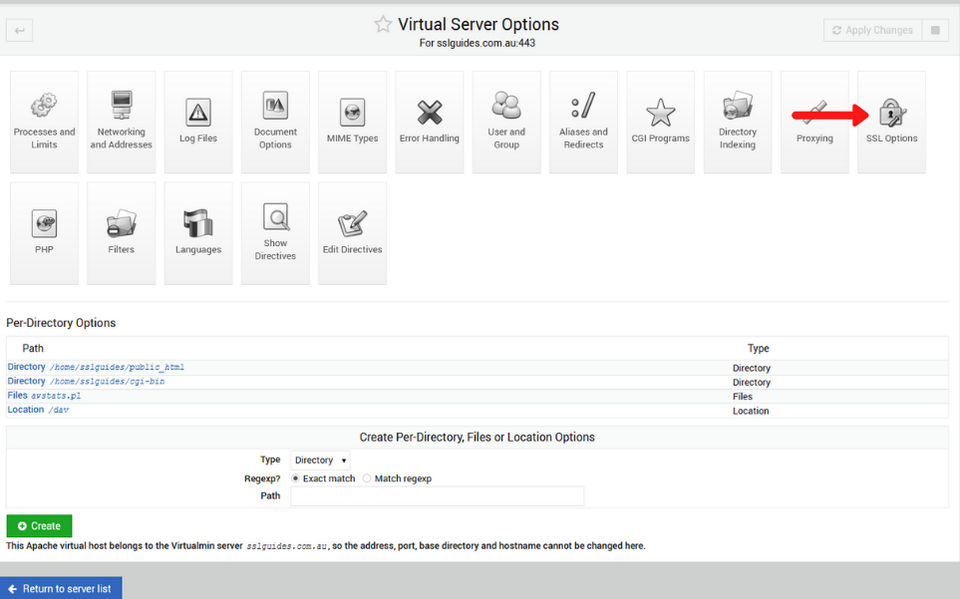
Go the VirtualMin Dashboard -> select your Domain Name and head over to the -> Services Option -> Configure SSL Website
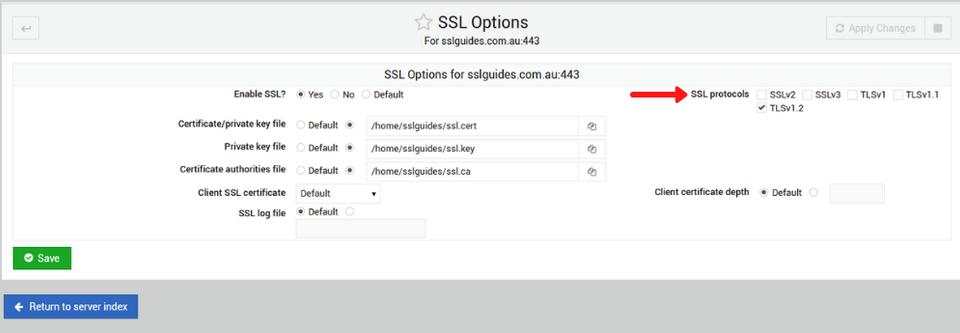
Click on SSL Options
Check all SSL Protocols and make sure that only TLS 1.2 and higher are enabled.
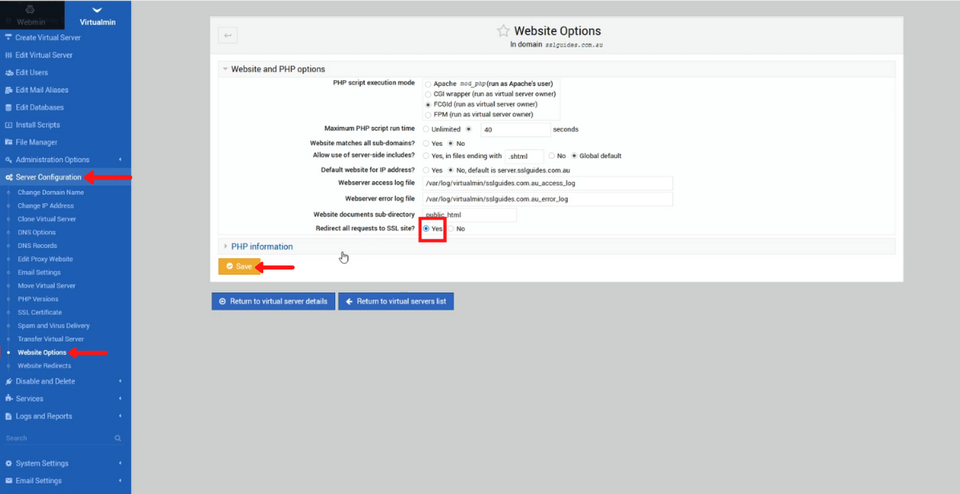
2: Redirect all HTTP traffic to HTTPS
Head over to the VirtualMin Dashboard and go to :-
Server Configuration -> Website Options.
On the bottom of Website and PHP options, you’ll see a Redirect all requests to SSL Site dialog. Make sure that you check on Yes and click on Save below
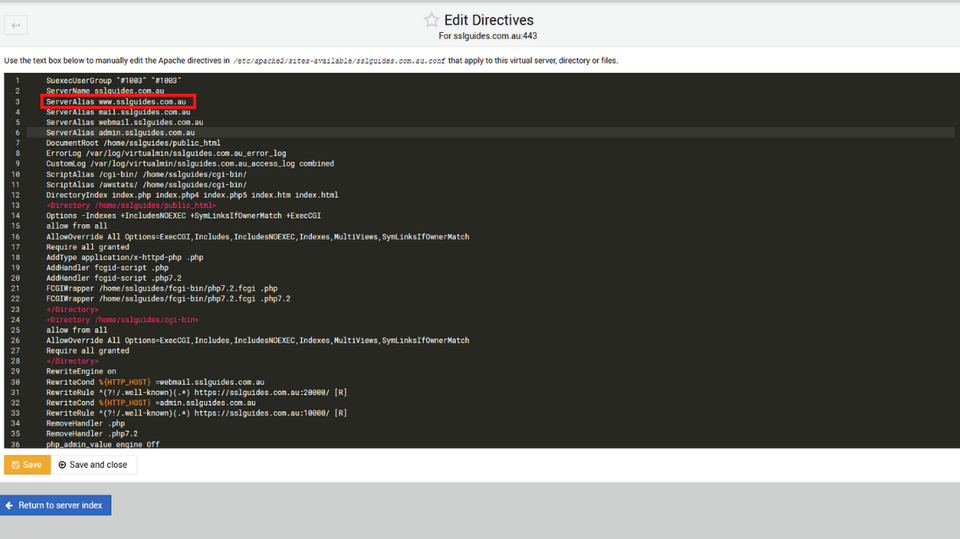
3: Redirect www to non-www site:
Some site owner prefer the non www version as by default, you’ll be able to access your site via both options and would like to only use one.
Go the VirtualMin Dashboard -> select your Domain Name and head over to the -> Services Option -> Configure SSL Website
Click on the Edit Directives Dialog Box
Remove the line that says:
text
ServerAlias www.your-domain-name
Discussions and Comments
Click here to view and join in on any discussions and comments on this article.