Step 1. Adding the Snap-In
- Firstly, from the run dialog, run "mmc.exe".
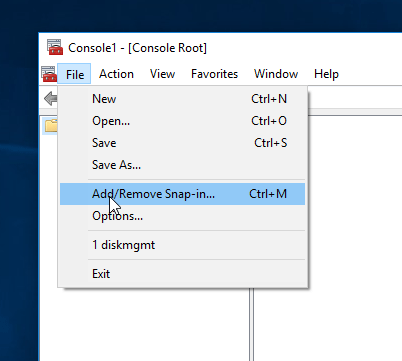
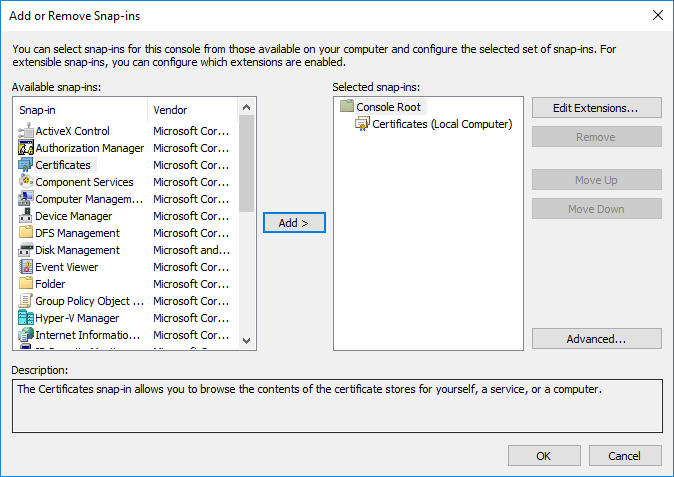
- From the MMC menu select File > Add/Remove Snap-in.. This will Open the Snap-ins window.
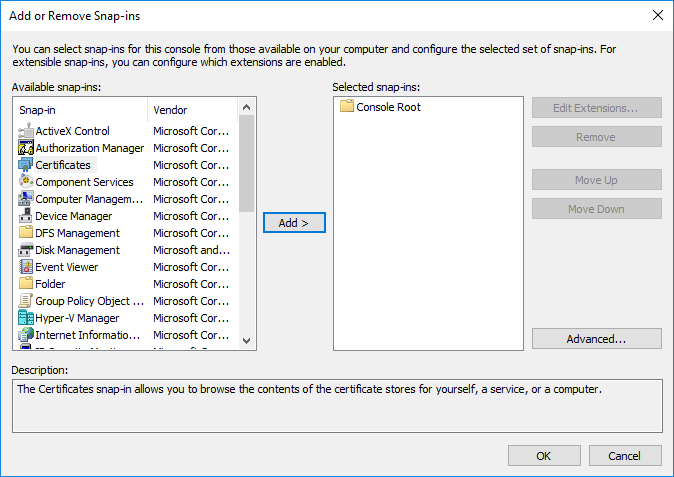
- Select “Certificates” on the left, and add it to your selected Snap-Ins. A dialog will appear, asking if you want to use your user’s certificate store, or the machine’s certificate store.
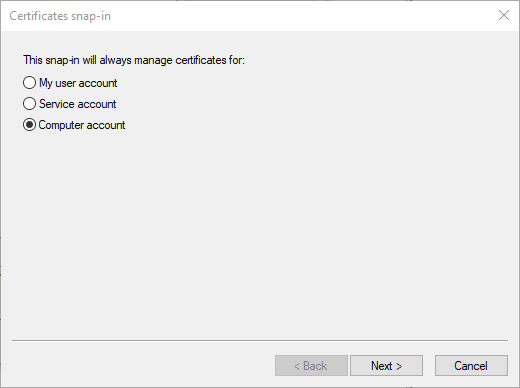
- Most of the time, you will want to select the computer’s certificate store. Almost all software querying for available certificates to display to you will look in this location (including IIS).
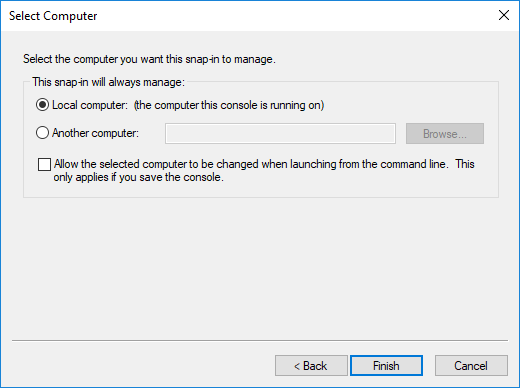
- Select “Local Computer” and then “Finish”.
Select “OK”. You are now in the certificates MMC.
Step 2. Starting the Wizard
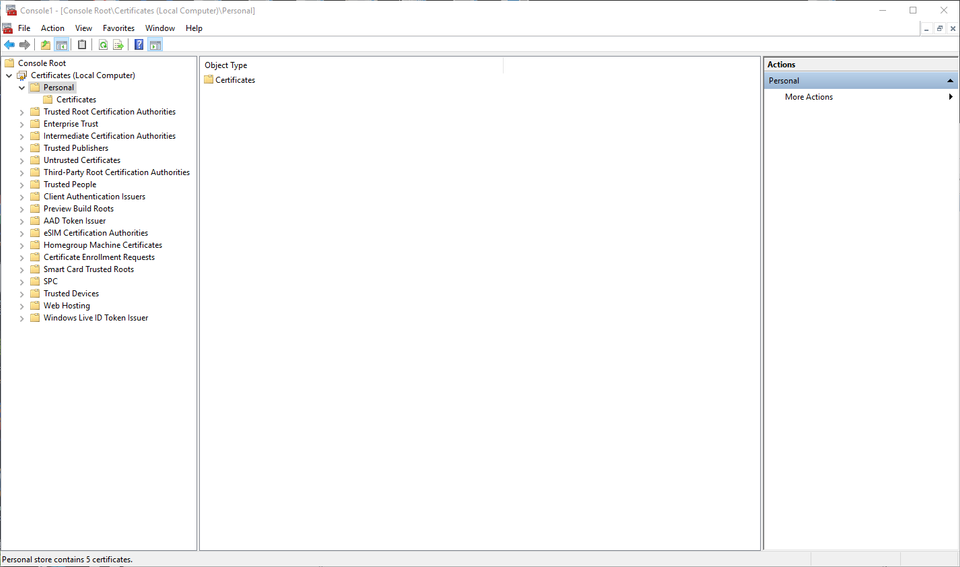
- On the left, expand “Certificates” and click on the “Personal” node.
This is where certificates that belong to you or your organization will go. Take a moment to familiarize yourself with the other nodes on the left. Importing the public portion of a certificate into “Trusted Root Certificate Authorities” is how you would trust a new Root CA in Windows. “Certificate Enrollment Requests” is where the private portion of your key is stored after generating a CSR while waiting for a CA’s response.
- To generate a CSR that can be consumed and signed by a Root Certificate Authority ( Such as GeoTrust ), right click on the “Personal” node and select All Tasks -> Advanced Operations -> Create Custom Request.
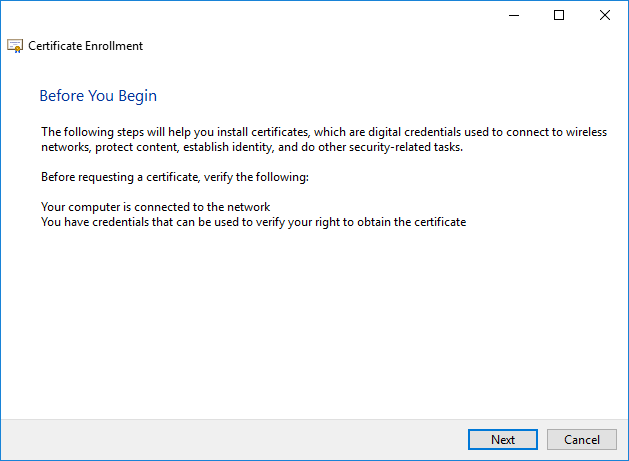
- In the Certificate Enrollment Window, Select Next.
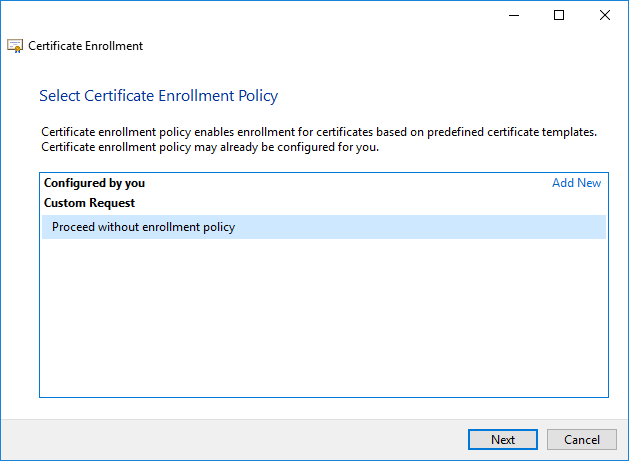
If your organization has an internal PKI via Active Directory Certificate Services, you will see organization driven policies appear here.
- For our purposes, we will select “Proceed without enrollment policy”.
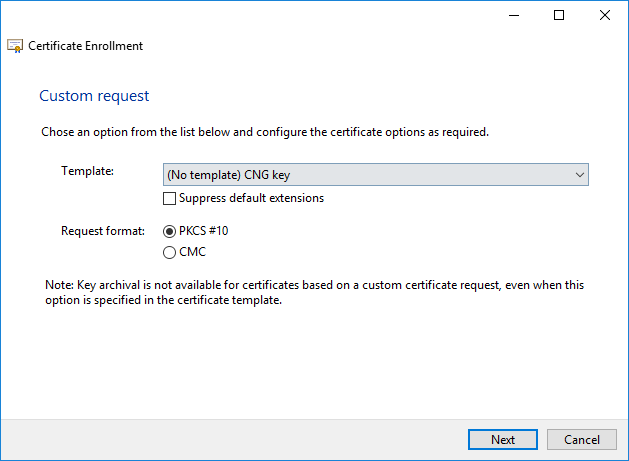
CNG (Certificate Next Generation) Keys are Microsoft’s latest strategy for secure key storage and retrieval. You can also select the legacy key option here if the client on which you are ultimately installing this certificate doesn’t support newer technologies.
- Select PK5 and click Next.
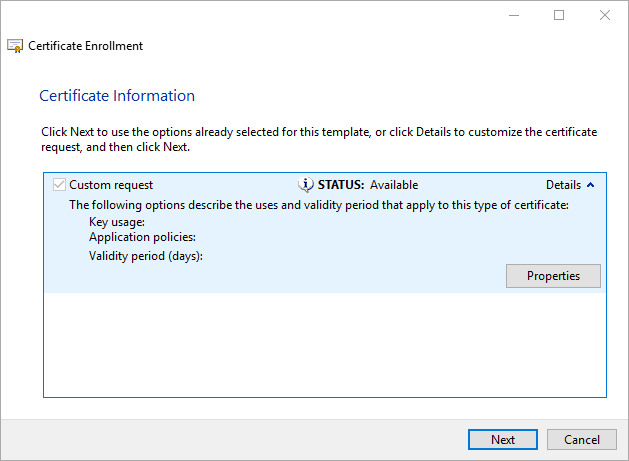
- On the upper right, expand Details. Then, select Properties.
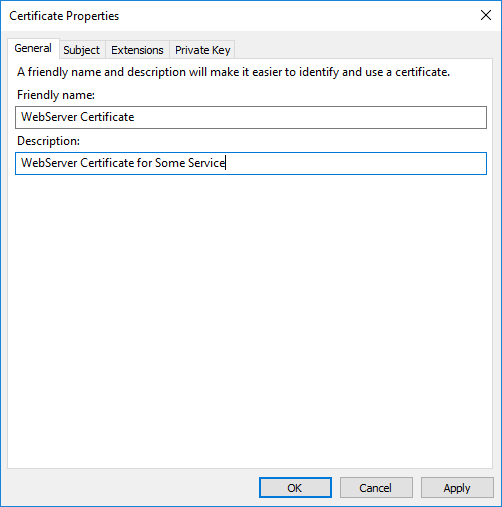
Give your certificate a descriptive name, and proceed to the Subject tab.
Step 3. Selecting your Certificate Attributes and Extensions
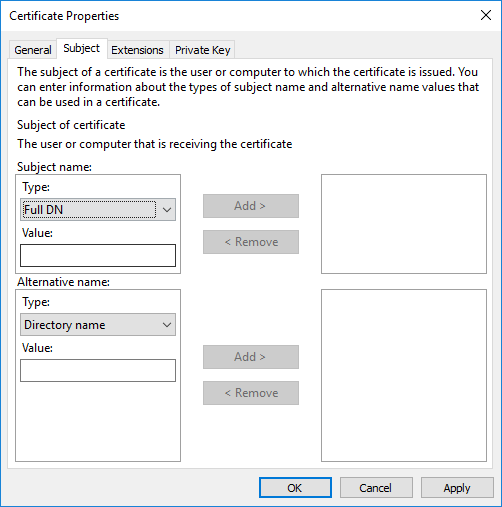
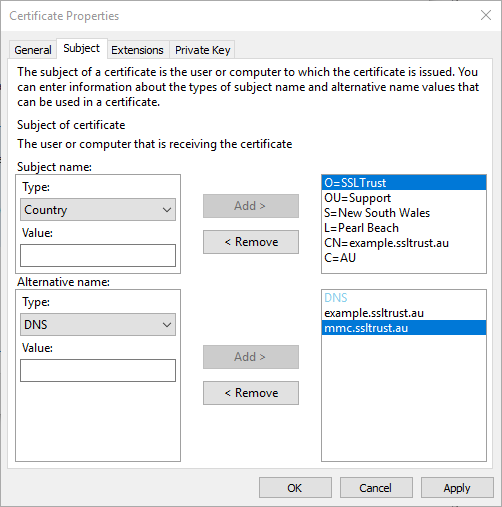
- This is where you will provide the attributes to be used for your certificate.
At minimum, you will need to provide the following attributes on the top pane:
- Common Name – The main FQDN of your application
- Country – The two digit A2 ISO Country Code for your country
- Locality – The town where your server or service is located
- Organization – The name of the company or entity that hosts the service
- Organization Unit – The sub-entity or department requesting the certificate (eg. “Marketing” or “IT”)
- State – The state or province where the service is located.
And on the bottom pane:
- DNS – This populates the Subject Alternate Name field on the certificate. One entry is needed for each valid DNS name the application will be accessed at. The Common name MUST be repeated in this field in order for Google Chrome to consider a website to be trusted. Older clients rely on a combination of the Common Name and the Subject Alternate Names, but it is always a best practice to repeat the Common Name in the list of Subject Alternate Names. Each Subject Alternate Name is subject to an additional charge from your CA.
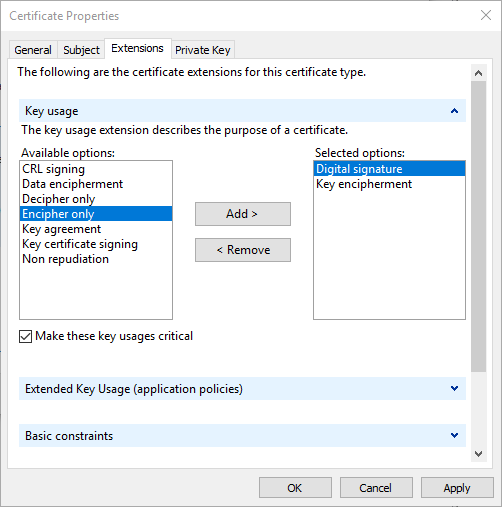
- Now, navigate to the Extensions tab. Expand Key Usage.
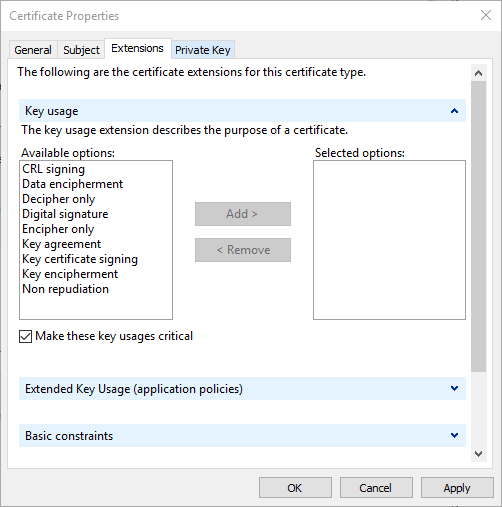
For a WebServer, the key usage extensions required are Key Encipherment and Digital Signature. If your software requires additional extensions (this is not common) it will be specified in the requirements in its documentation.
- Expand Extended Key Usage Application Policies.

- Add Server Authentication and Client Authentication.
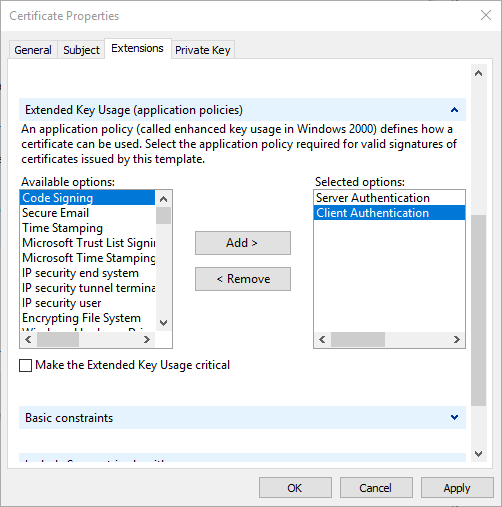
Again, if additional policies are required, they will be specified in your software vendor’s documentation.
Step 4. Private Key Settings
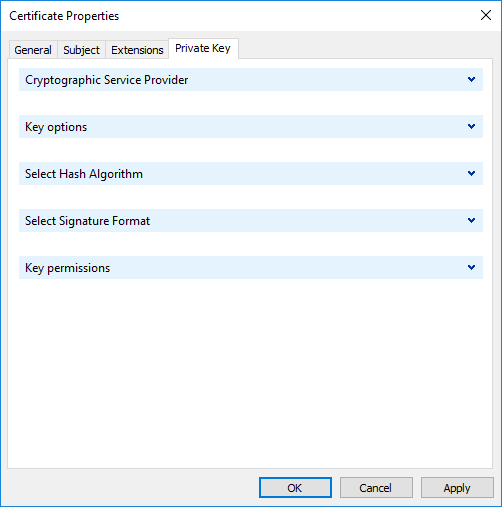
- Still within the Certificate Properties window, navigate to the Private Key tab.
- Expand Cryptographic Service Provider.

Usually RSA is fine, but depending on your organization’s security policies, ECDH keys can provide the same or better protection using fewer CPU cycles.
- Expand Key Options.

The default of “1024” is considered insecure for modern cryptographic purposes. Select a keysize of at least 2048. 4096 is not considered more secure than a key size of 2048 as of this writing, but as computers get faster, this may change in the future. A higher key size comes with a performance penalty, so a key size of exactly 2048 is recommended.
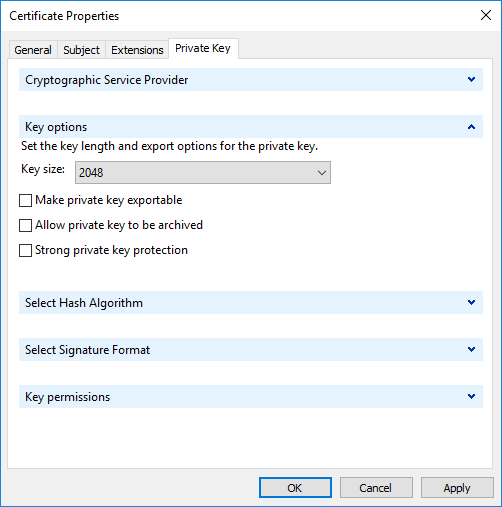
If the device on which you are generating the CSR is also the (only) device the certificate will be used, you should leave “make private key exportable” unchecked. This will prevent the certificate from being exported from the machine in an easy fashion. (It can still be sniffed from memory by an advanced attacker who has compromised the box). If you intend to use this certificate elsewhere, or want to store it in a secure location as a backup, check this box. When you export it, you will be able to protect it with either a password, or by binding it to one or more Active Directory security principals.
Do not check “Allow private key to be archived”. This option is usually used for user certificates used for authentication purposes. It would allow an administrator issuing the key to be able to recover the key for a user should they lose it. It is a controversial option, as an administrator ideally should not have access to a user’s private key.
Do not check “Strong private key protection”. This option is used to require a passphrase be entered whenever the key is accessed by the operating system. Again, it is useful for user certificates used for authentication, but for a webserver, there is not practical or useful.
- Under “Hash Algorithm” select Sha256.
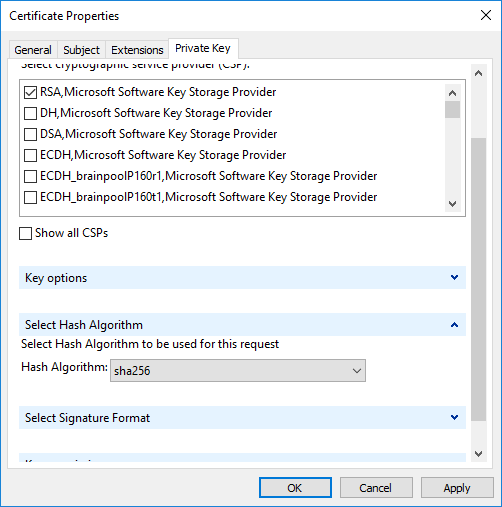
You may be wondering at this point why there is nowhere to select a signature algorithm. Unfortunately, the MMC is hard coded to request a SHA-1 signed certificate. Fortunately, CA’s in this day and age will issue only SHA-256 or better signed certificates, and ignore this insecure request.
- Select OK and you will be taken back to the “Certificate Enrollment” page.
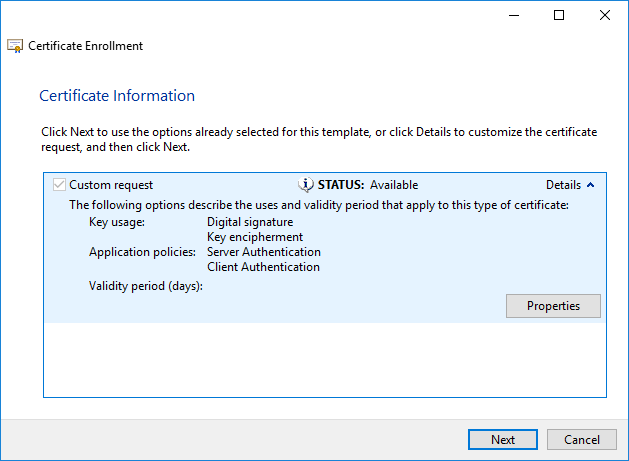
- Select Next. It is okay that the validity period is blank. CA’s will request this value from you at purchase time.
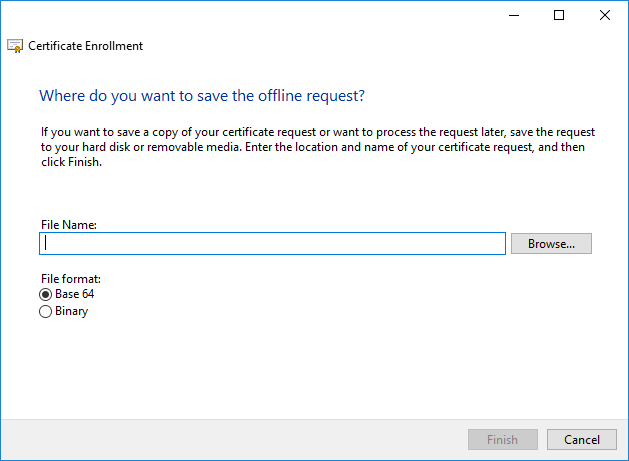
Choose a location on the file system to export your base 64 CSR, and click Finish. The contents of this file will be sent to your CA when you order an SSL Certificate. If you look under the “Certificate Enrollment Requests” node, you will see an object corresponding to the CSR awaiting the CA’s response.
When the CA returns a response (which is really just the public portion of your now signed certificate), it can be imported by right clicking on the “Personal” node and selecting All Tasks -> Import. The enrollment request will disappear from “Certificate Enrollment Requests” and be replaced by an entry in the “Personal” node corresponding to your newly signed certificate. It is now available for use by software on your system, or available to be exported by right clicking the certificate and choosing All Tasks -> Export.
Discussions and Comments
Click here to view and join in on any discussions and comments on this article.